 Pin it
 My cousin called me three weeks before her graduation asking if I could bring something special to the celebration dinner. I'd been wanting to master mini cheesecakes for a while, and this felt like the perfect moment to try. There's something about making tiny, elegant desserts that made me feel like I was creating little edible congratulations gifts. The first batch came out of the oven golden and wobbling just right, and I knew I'd stumbled onto something that would become a staple for every milestone celebration in our kitchen from that point forward.
Watching my cousin's face light up when she saw the little cheesecake bites with graduation picks standing proud on each one made every minute of prep work worth it. Her friends were asking for the recipe before they'd even finished their first bite, and I realized these weren't just desserts—they were conversation starters, little edible symbols of moving forward to something new.
Ingredients
- Graham cracker crumbs (1 cup): The foundation of everything, so make sure they're fine and even; if you can't find pre-made crumbs, a food processor makes quick work of whole crackers.
- Granulated sugar for crust (2 tbsp): This adds just enough sweetness to balance the butter without making the base taste like dessert before you get to the actual cheesecake.
- Unsalted butter, melted (4 tbsp): The butter must be fully melted so it distributes evenly through the crumbs; if it's too cool, the mixture won't hold together properly.
- Cream cheese, softened (12 oz): Room temperature cream cheese blends smoothly without lumps, so take it out of the fridge 30 minutes before you start mixing.
- Granulated sugar for filling (1/2 cup): Beat this with the cream cheese until it's completely incorporated so you don't end up with gritty bites.
- Large egg (1): This binds everything together and helps the cheesecake set properly, so don't skip it or substitute with egg white.
- Vanilla extract (1 tsp): A small amount goes a long way in cheesecake, so resist the urge to pour extra; it'll overpower the delicate cream cheese flavor.
- Sour cream (2 tbsp): This adds tang that makes the cheesecake taste less heavy and more interesting, but measure carefully because too much makes the filling grainy.
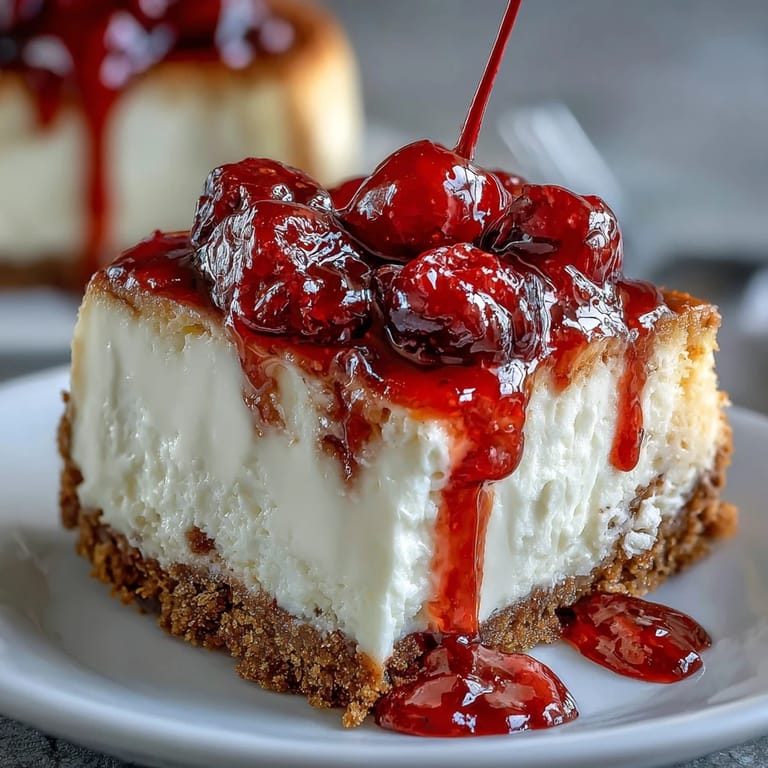
- Fresh mixed berries (1/2 cup): Choose firm berries without soft spots, and dice them small so they sit neatly on top rather than rolling off.
- Fruit preserves, optional (2 tbsp): A light brush of warmed preserves adds shine and keeps the berries from drying out, plus it looks professionally done.
- Diploma picks: You can buy these at party supply stores or make your own from card stock rolled into tiny scrolls and tied with twine for a personal touch.
Tired of Takeout? 🥡
Get 10 meals you can make faster than delivery arrives. Seriously.
One email. No spam. Unsubscribe anytime.
Instructions
- Heat your oven and prep the pans:
- Preheat to 325°F and line your mini muffin pan with paper liners; this lower temperature keeps the cheesecakes from cracking on top and ensures the centers stay creamy instead of overbaking.
- Build the crust:
- Mix graham cracker crumbs with sugar and melted butter until it looks like wet sand, then press about a teaspoon into each liner firmly so the crust stays intact when you bite into it. Bake for just 5 minutes to set the butter and give it a slight color, then let it cool while you make the filling.
- Blend the filling until silky:
- Beat softened cream cheese and sugar together until completely smooth—this takes about 2 minutes and makes all the difference in texture. Add the egg, vanilla, and sour cream and blend gently just until combined; overmixing here will make your cheesecakes tough and airy instead of dense and creamy.
- Fill and bake low and slow:
- Spoon about a tablespoon of filling over each crust and smooth the tops slightly so they bake evenly. Bake for 13 to 15 minutes until the centers still jiggle just a tiny bit when you shake the pan—they'll keep cooking as they cool and set perfectly in the fridge.
- Cool with intention:
- Let them sit in the pan for 15 minutes so they firm up slightly, then transfer to a wire rack to cool completely before refrigerating for at least an hour. This gradual cooling prevents the sudden temperature change that causes cracks.
- Top and decorate:
- Once chilled, add a small handful of diced berries to each bite and brush lightly with warmed preserves if using for extra shine. Insert a diploma pick just before serving so it stands upright and looks festive.
 Pin it
 There was a moment during my cousin's graduation party when three different people asked me the same question within five minutes: could they take one of these home for their families? That's when I understood that food made with intention and care becomes something people remember. These little cheesecakes had stopped being just dessert and became tiny edible wishes for her future.
Why Mini Size Matters for Special Moments
The size of these cheesecake bites is intentional and brilliant. I learned early on that people at celebrations want to enjoy something elegant without committing to a full slice, and these little cups deliver that perfectly. The smaller portion also means the filling cooks evenly without the risk of a baked edge and a raw center, which is one of the biggest cheesecake disasters.
Making Them Ahead Without the Stress
One of my favorite things about this recipe is that you can bake them up to two days ahead and keep them in the refrigerator without the toppings. I usually add the berries and diploma picks just before the party starts, which gives me one less thing to worry about while I'm setting up. This flexibility has saved me countless times when I'm juggling multiple dishes for a celebration.
Customizing Your Bites for Different Celebrations
After making these for my cousin's graduation, I started experimenting with variations depending on who I was celebrating. Lemon zest makes them bright and cheerful for spring celebrations, while a chocolate drizzle elevates them for more formal occasions. The basic formula stays the same, but these tiny tweaks let you make them feel personal to whoever you're honoring.
- Try adding a tiny pinch of lemon zest to the filling for a subtle citrus brightness that pairs beautifully with fresh berries.
- A thin chocolate drizzle over the cooled cheesecake before adding berries feels fancier and adds depth without overwhelming the cream cheese flavor.
- If you're making these for someone with dietary restrictions, the gluten-free graham cracker swap works seamlessly and no one will taste the difference.
 Pin it
 These cheesecake bites have become my go-to when I want to celebrate someone in a way that feels thoughtful and handmade. They're proof that something simple, made with attention and care, can become a memory someone talks about long after the celebration ends.
Recipe FAQs
- → What makes the crust buttery and firm?
Mixing graham cracker crumbs with melted unsalted butter and sugar creates a rich, buttery crust that holds its shape after baking.
- → Can I use different toppings instead of berries?
Absolutely, feel free to use fruit preserves, chopped nuts, or a light drizzle of chocolate to customize the topping.
- → How long should these bites chill before serving?
Chilling for at least one hour helps the filling set properly and enhances the creamy texture.
- → Are there alternatives for the graham cracker crust?
You can substitute gluten-free graham crackers or crushed nuts for a different crust texture and dietary needs.
- → What is the best way to add shine to the fruit topping?
Warming fruit preserves slightly and brushing them over the fresh berries adds a glossy, appetizing finish.