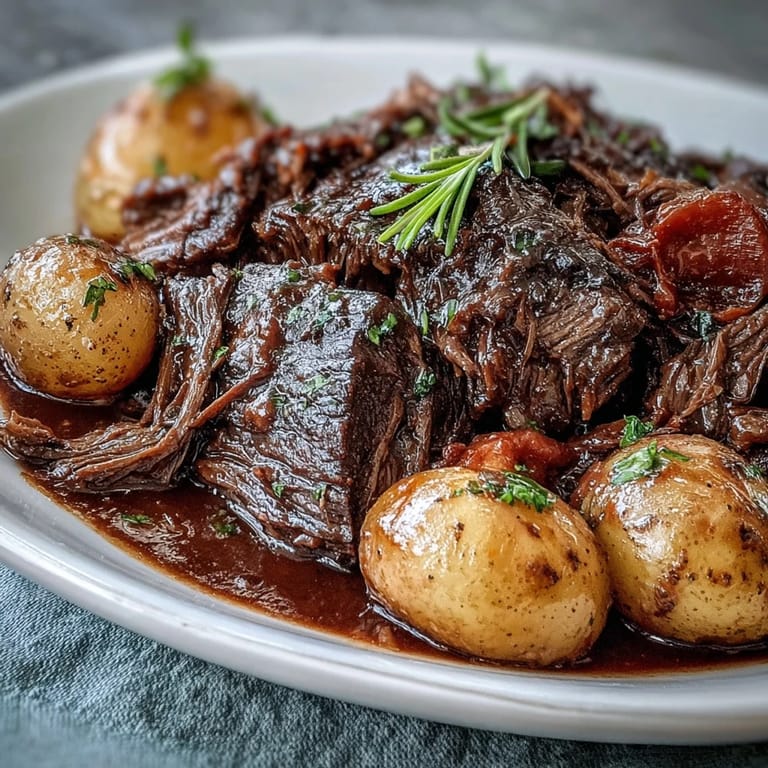
 Pin it
 The smell of a roast browning in butter is something I can never quite shake from my mind. It fills the whole house with this warm, meaty promise that dinner is going to be worth the wait. I learned to make pot roast on a chilly Sunday afternoon when I had more time than skill, and the forgiving nature of slow braising taught me that patience in the kitchen often tastes better than precision. The way the beef surrenders to the heat, the vegetables turn sweet and soft, and the sauce thickens into something almost luxurious still surprises me every time. This is the kind of dish that makes you feel capable, even when everything else feels a little out of control.
I made this for a small dinner party once, and my friend who claimed she didnt like pot roast asked for seconds before I even sat down. There was something about the way the sauce clung to the potatoes and how the meat shredded without any effort that changed her mind. We ended up talking late into the evening, the empty pot still warm on the stove, and I realized that some recipes dont just feed people, they slow time down just enough to matter. The rosemary lingered in the air long after we cleared the table. It became one of those nights I measure other nights against.
Ingredients
- Beef chuck roast or blade roast (3 to 3.5 lb): The marbling is your friend here; it melts into the meat during the long braise and keeps everything moist and rich.
- Kosher salt and black pepper: Season generously before searing to build a crust that locks in flavor and gives the sauce a head start.
- All-purpose flour (2 tbsp): A light dusting helps the sear develop color and also thickens the braising liquid ever so slightly as it cooks.
- Olive oil and unsalted butter: The combination gives you a higher smoke point plus that nutty, golden richness butter brings to the browning process.
- Yellow onion, garlic, carrots, celery, baby potatoes: These are the backbone of the dish, turning soft and sweet as they simmer and adding body to the sauce.
- Tomato paste: Cooking it down until it darkens adds a subtle umami depth that balances the wine and broth beautifully.
- Dry red wine: It deglazes the pan, lifts all those caramelized bits, and adds acidity that cuts through the richness of the beef.
- Beef broth, Worcestershire sauce: These build the savory foundation of the braising liquid and amplify the meatiness without overwhelming the vegetables.
- Fresh rosemary, thyme, bay leaves: Woody herbs release their oils slowly over hours, perfuming the entire pot with earthy, aromatic warmth.
- Cornstarch slurry (optional): If you like a thicker, spoonable gravy, this is your easiest fix without any flour lumps.
- Fresh parsley: A handful of brightness at the end wakes up the whole dish and makes it look like you know what youre doing.
Tired of Takeout? 🥡
Get 10 meals you can make faster than delivery arrives. Seriously.
One email. No spam. Unsubscribe anytime.
Instructions
- Preheat and prep the beef:
- Set your oven to 300°F if youre using it. Pat the roast completely dry with paper towels, then season every side with salt and pepper, and dust lightly with flour, shaking off the excess so it doesnt clump.
- Sear the roast:
- Heat 2 tablespoons of oil and the butter in a heavy pot over medium-high heat until shimmering. Sear the roast for 4 to 5 minutes per side until deeply golden brown, including the edges, then transfer to a plate.
- Cook the aromatics:
- Lower the heat to medium, add the remaining oil if the pot looks dry, then toss in the onion wedges and cook for 3 to 4 minutes until softened. Add the garlic and cook for another 30 to 60 seconds until fragrant.
- Build the base:
- Stir in the tomato paste and cook for 1 to 2 minutes until it darkens and smells sweet. Pour in the red wine, scraping up all the browned bits from the bottom, and let it simmer for 2 to 3 minutes to reduce slightly.
- Add the braising liquid:
- Stir in the beef broth and Worcestershire sauce, then add the rosemary, thyme, and bay leaves. Nestle the roast back into the pot along with any accumulated juices; the liquid should come about halfway up the meat.
- Start the braise:
- Bring everything to a gentle simmer over medium heat. Cover tightly with a lid, then either reduce the heat to low or transfer the pot to the oven, and cook undisturbed for 1 and a half hours.
- Add the vegetables:
- After the first 1 and a half hours, carefully flip the roast over. Tuck the carrots, celery, and potatoes around the meat, pushing them into the liquid, then re-cover and continue cooking for another 1 and a half to 2 hours until the beef is very tender.
- Rest and finish the sauce:
- Transfer the roast and vegetables to a platter and tent loosely with foil. Skim any excess fat from the surface of the liquid, then bring it to a simmer and stir in the cornstarch slurry if you want a thicker gravy, cooking for 2 to 3 minutes.
- Slice and serve:
- Discard the herb stems and bay leaves. Shred the beef into large chunks or slice it against the grain, return it to the pot or arrange it over the vegetables, and spoon the sauce generously over everything. Garnish with chopped parsley and serve hot.
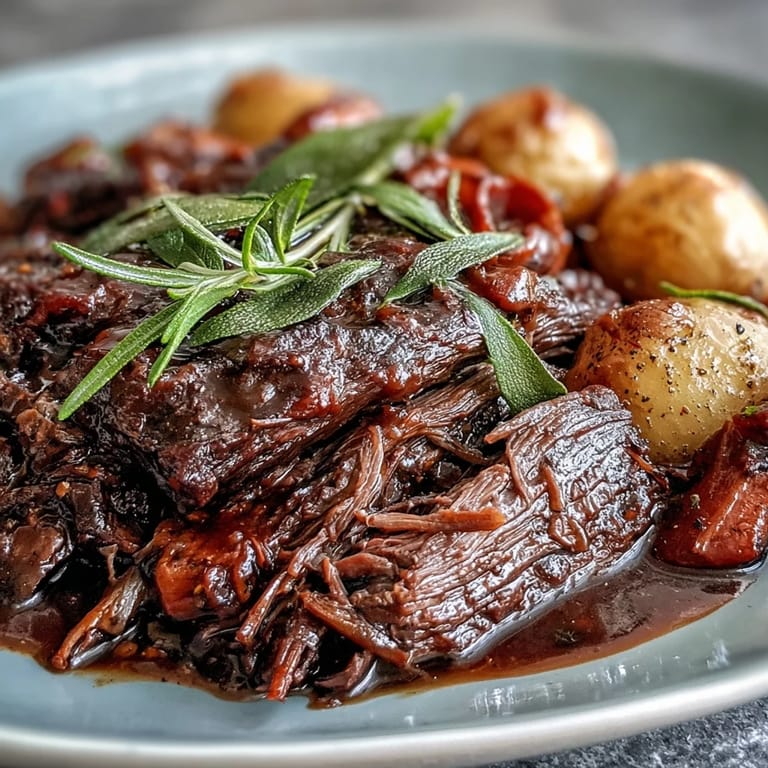 Pin it
 One winter evening, I served this to my brother who had just moved into his first apartment and was living off cereal and scrambled eggs. He sat quietly for a moment after his first bite, then said it tasted like home, which is about the highest compliment Ive ever gotten in a kitchen. I sent him home with the leftovers and the recipe scribbled on a napkin. A week later, he called to say hed made it himself and felt like an actual adult for the first time.
How to Get the Best Sear
The key to a good sear is a dry surface and a hot pan. If the meat is even a little wet, it will steam instead of brown, and youll miss out on all that flavor. I always pat the roast with paper towels until it feels almost tacky, then I let the pan get hot enough that a drop of water sizzles and evaporates immediately. Dont move the meat around; let it sit undisturbed so a crust can form. The smell of that crust developing is how you know youre on the right track.
Choosing the Right Cut
Chuck roast is my go-to because it has enough fat and connective tissue to stay moist during a long braise. Blade roast works just as well and sometimes has a little more marbling. Avoid lean cuts like sirloin; they dry out and turn stringy no matter how long you cook them. When youre at the butcher, look for a roast with visible white streaks running through it. Those streaks are what turn into tender, melty bites after three hours in the pot.
Storing and Reheating
Pot roast is one of those rare dishes that actually tastes better the next day. The flavors settle and deepen overnight, and the sauce thickens as it cools. I store everything together in an airtight container in the fridge for up to four days, and I reheat it gently on the stovetop with a splash of broth to loosen the sauce. You can also freeze portions for up to three months, though I recommend storing the meat and vegetables separately so they hold their texture better when thawed.
- Let the pot roast cool completely before transferring to the fridge to avoid condensation that waters down the sauce.
- Reheat slowly over low heat to keep the beef from toughening up.
- Use leftover shredded beef in tacos, over polenta, or piled onto toasted bread with a smear of horseradish.
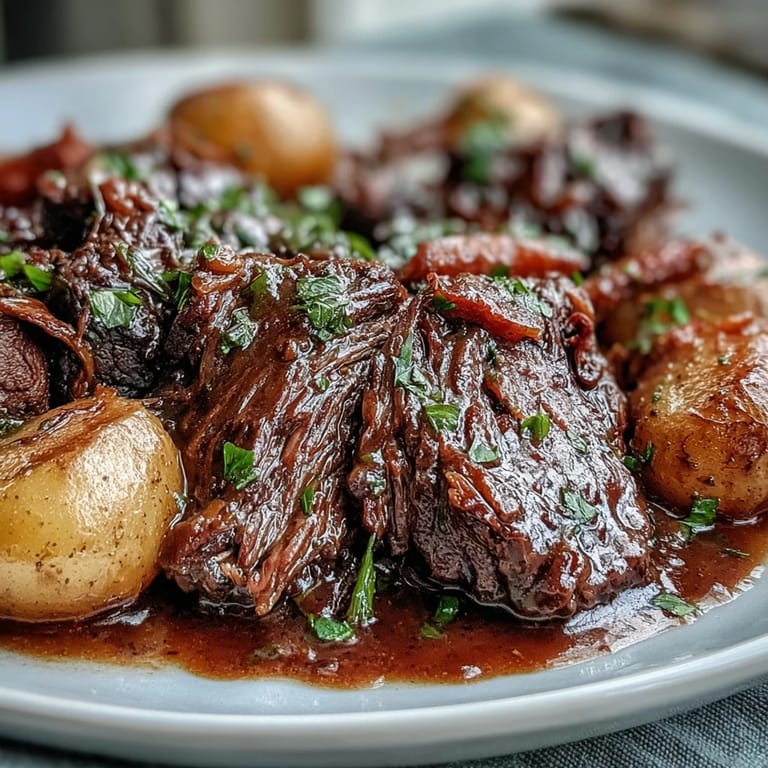 Pin it
 This pot roast has pulled me through cold evenings, last-minute gatherings, and quiet Sundays when I just wanted something warm and steady to come home to. Its the kind of recipe that makes you feel like youve got your life together, even if the rest of the week says otherwise.
Recipe FAQs
- → What cut of beef works best for pot roast?
Chuck roast or blade roast are ideal choices because they have plenty of marbling and connective tissue. As the meat slow-cooks, these tissues break down and transform into tender, succulent beef. Look for well-marbled pieces with good fat content.
- → Can I make this in a slow cooker?
Absolutely. After searing the beef and sautéing the aromatics, transfer everything to your slow cooker. Cook on low for 8-10 hours or high for 5-6 hours. Add vegetables halfway through cooking if you prefer them to retain more texture.
- → Why is my gravy not thickening?
The natural reduction from braising usually creates adequate body. If you prefer thicker gravy, whisk together cornstarch and cold water, then stir into the simmering liquid. Cook for 2-3 minutes until it reaches your desired consistency. You can also mash some potatoes into the sauce.
- → Can I substitute the red wine?
Yes, replace the wine with additional beef broth for a non-alcoholic version. For similar acidity and depth, add a tablespoon of balsamic vinegar or apple cider vinegar along with extra broth. The flavor profile will shift slightly but remain delicious.
- → How do I store and reheat leftovers?
Store in airtight containers for up to 4 days in the refrigerator or freeze for 2-3 months. Reheat gently on the stovetop over low heat, adding a splash of broth if needed. The flavors often develop further overnight, making leftovers even more enjoyable.
- → What sides complement pot roast?
Crusty bread for soaking up gravy is essential. Buttered egg noodles, creamy mashed potatoes, or buttered polenta work beautifully. A simple green salad with vinaigrette or steamed green beans adds freshness to balance the rich, hearty main.